...
Select the disk to clone from in the main application window and click Clone this disk...
- In the wizard that opens Click Select a disk to clone to...
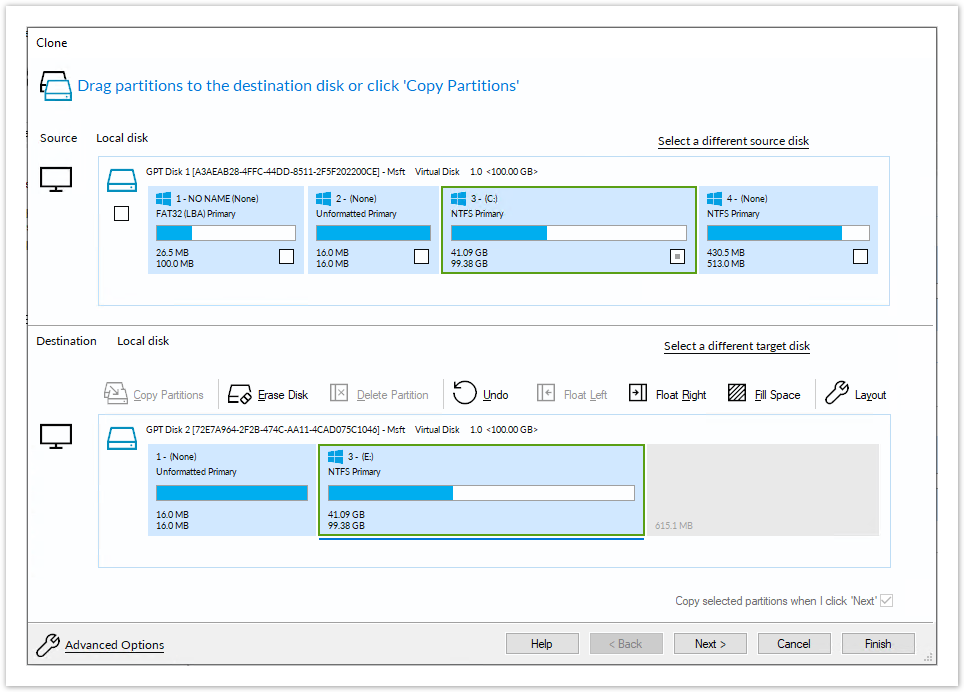
Select the clone target disk. In this case, there is only one disk available.
If you do not want to modify the order or size of partitions of the clone, click Next. This is the default behavior.
Alternatively, drag the partitions you want to clone, the red arrow below shows this.Becomes
In this example, there is 650MB of free space after the copied partition. You can modify the size of each partition to fit the new disk if required.
Info You can delete partitions on the target disk by selecting and clicking 'Delete existing partitions'.. To extend the partition to make use of the remaining space on the destination, click Fill Space.
You can open the more detailed Partition Properties dialogue by selecting a partition on the destination then clicking Layout. Using the Partition Properties dialogue you can:
- Set the partition size precisely using the Partition Size entry box.
- Resize the partition automatically by clicking Maximum size or Minimum size. You can set the partition back to the original size by clicking Revert.
- Click OK.
- If required, click Advanced Options to change settings for this clone:
Include Page Clone - Avdanced Advanced Options Clone - Avdanced Advanced Options
Click Next.Anchor 1 1
The options to Add Schedule, Edit Schedule, or Delete Schedule is displayed.
Click Add Schedule to optionally schedule your clone
Make any required changes and click Next.
For more information see Scheduling backups.- Review the settings and click Finish.
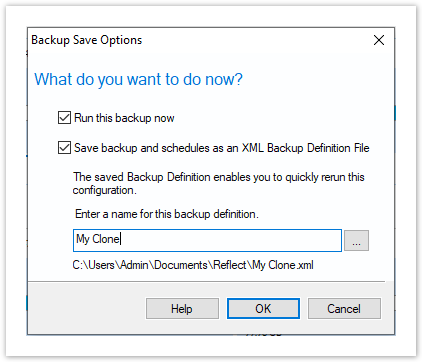
Verify the settings in Backup Save Options and if appropriate, click OK.
Info Note: Saving a backup definition enables you to run your Clone at any time with a single click Info Note: You must save your backup definition if you have created Clone schedules. Your schedules cannot run if this step is missed. If you want to run the Clone at this point, select Run this backup now and click OK.
A Warning box appears, if appropriate click Continue.
Info title Important The target disk for the clone operation will be overwritten. This is unrecoverable, so please ensure that the target disk contains no valid data. The clone operation now starts.
...


