In this article:
This article contains information about booting the deployment media and using the deployment media to create a golden image.
First, it is recommended that a reference computer is created, this is a computer that contains an operating system, partition scheme, and software that will be deployed to the target computers. It is also recommended that the reference computer should “Sysprepped” to generalize it for mass deployment. You can read more about Sysprep in this article.
Once Sysprep has been run, the computer will be configured to boot into the Out of Box Experience (OOBE). During the OOBE, the first-time configuration is performed on a Windows installation. This includes creating a user account and configuring the preferences for that account. The golden image should be created before the operating system boots and the OOBE starts.
To do this, once Sysprep has been run and before Windows next boots, use the deployment media to boot the computer. Since the deployment media contains multiple versions of Windows PE, you will need to select the correct version for the computer you are using.

Important Note
If the CPU architecture of the computer is 32bit, then you will need to select a 32-bit version of the deployment media, otherwise, a 64-bit version of PE should be used. If the computer has UEFI firmware, then it is recommended that a PE 10 version of the deployment media is selected, if the computer has BIOS firmware, then a PE 3.1 version should be used.
If the in-box PXE server is being used to boot the deployment media on the endpoints, the relevant booting option will be selected for the endpoint automatically.
Once the deployment media has been booted, the Macrium PE Agent will be displayed. The ‘Capture Golden Image’ option will be disabled until the PE Agent has logged in to the Site Manager server, enabling access to the golden image stores.

Select ‘Log in’ to open the ‘Site Manager Login’ dialogue. The PE Agent can log in to the Site Manager server using the credentials of any user account, however, the options that are available to the logged-in user will vary depending on the permissions that have been assigned to the user. You can read more about user access management in this article. In this example, we will assume that the user has the administrator role, providing them access to all the options in the deployment media.
Once the user has logged in to the Site Manager server, the login will show ‘Authenticated’ and the username of the user that logged in. The ‘Take Golden Image’ button is now active.

Selecting ‘Take Golden Image’ opens the Take Golden Image wizard and shows the golden image stores that have been created in SiteDeploy®.
First, select the golden image store that will be used as the destination for this golden image.

In the window that opens, enter a name and, optionally, a description for the golden image; this name and description will be used to distinguish the golden images in the future. If the computer has been Sysprepped, select the Sysprep checkbox. It is important to note that the 'Sysprep' checkbox is informational, and will not run Sysprep:
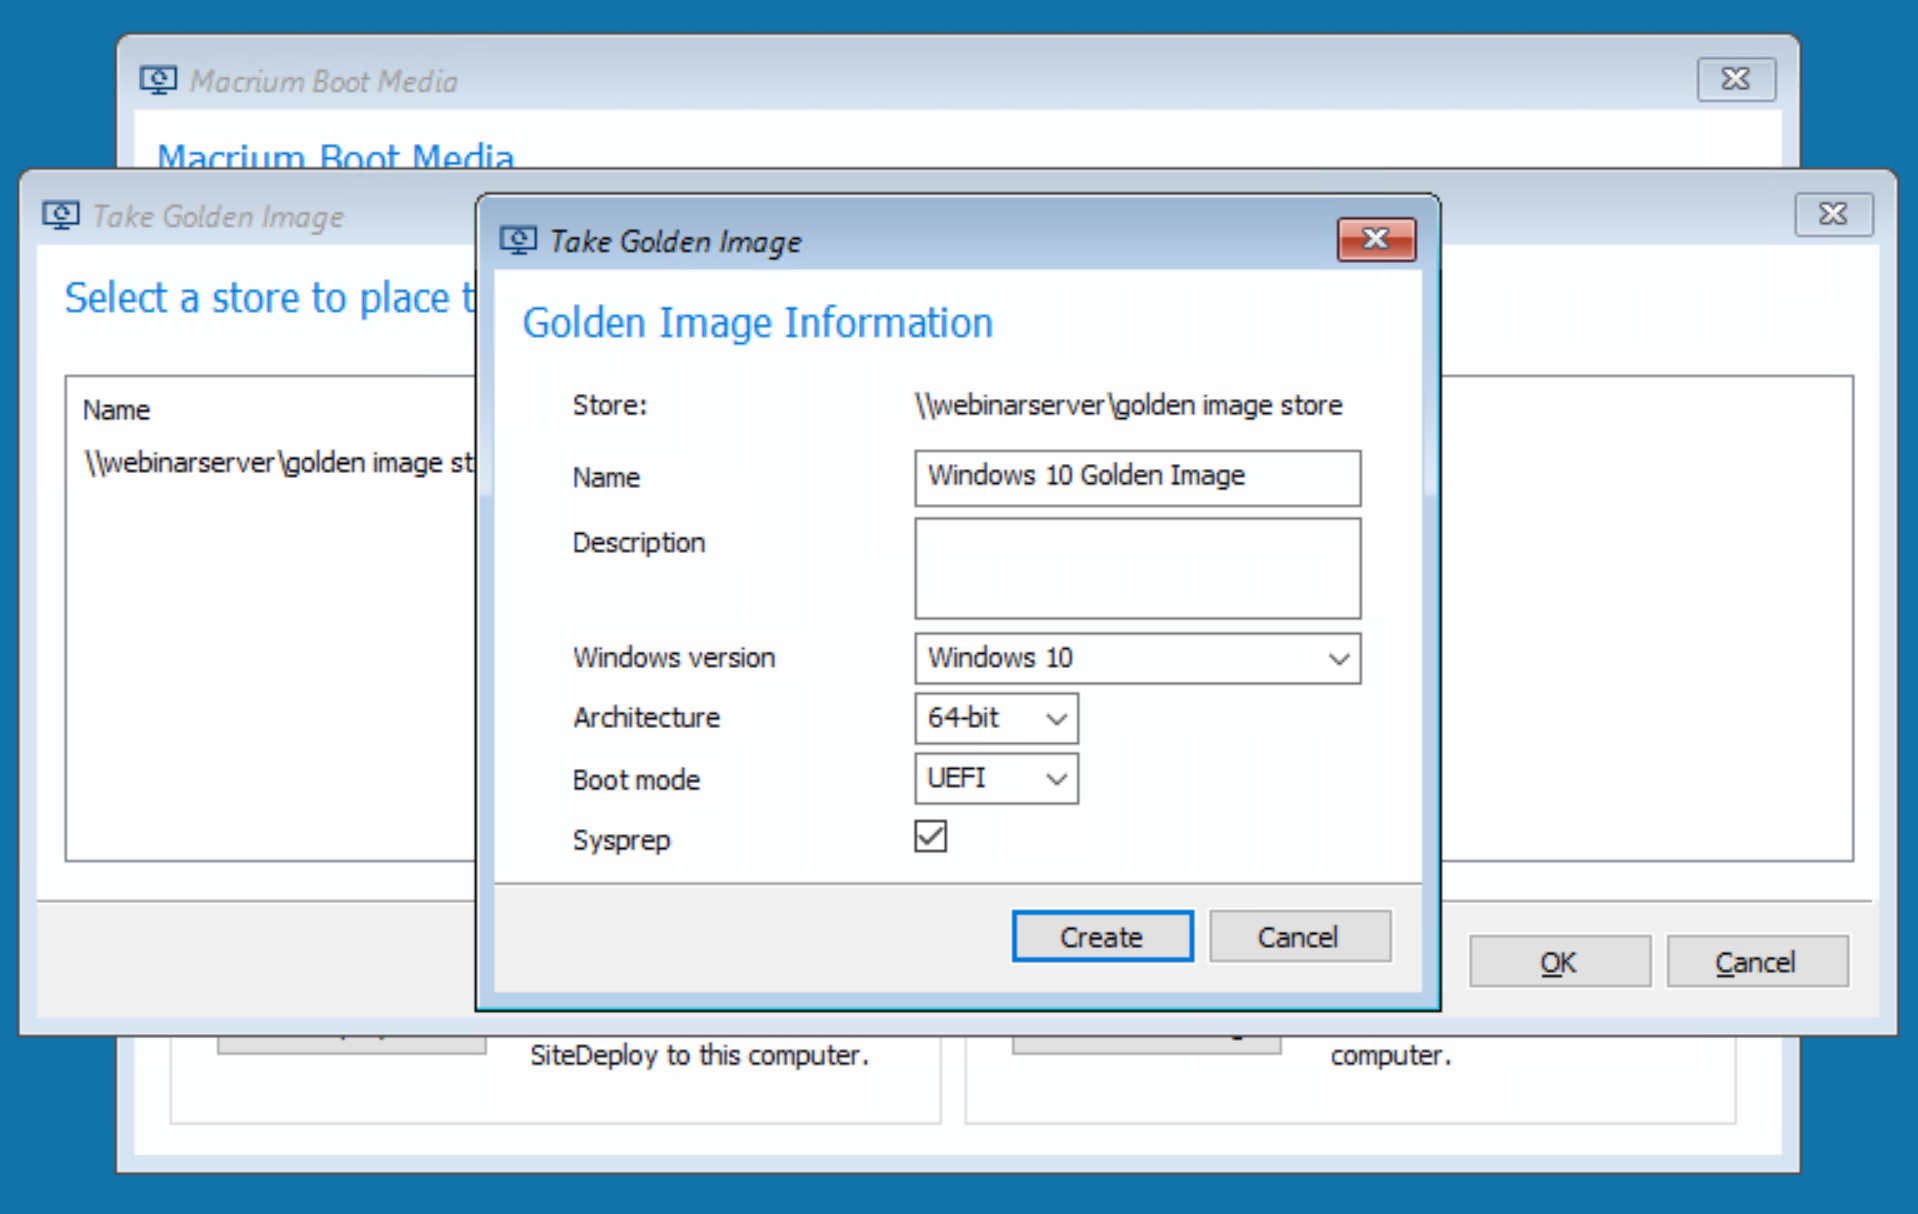
Once the information has been specified for the golden image select ‘Create,’ this will open the 'Golden Image' wizard.
Next, select the partitions from the reference computer that will be included in the golden image. It is recommended that all system partitions are included in the golden image, as they will be required to boot Windows when the golden image is deployed. System partitions are denoted by the Windows icon shown on the partition:

Select ‘Finish’ to start the golden image creation.
The progress of the golden image creation can be viewed in the window that opens on the computer being imaged:

Progress can also be viewed using the ‘Activity’ widget on the Site Manager dashboard. Selecting the 'i’ icon will provide a more detailed view of the progress:

Once a golden image has been created, it can be viewed in the ‘Golden Images’ tab of SiteDeploy®. Information about the golden image and tags associated with the golden image can also be viewed.

Importing an Existing Golden Image
Existing images can also be imported into a golden image store. This enables backward compatibility with golden images that were created using the Deployment Kit. Existing full images can be imported into the golden image store by placing the image in the 'Import' folder of the golden image store.

Once the image has been imported, it will be available in the 'Golden Images' tab. The image may have incorrect information and tags regarding the operating system that is contained in the golden image:

The information and tags can be manually updated by selecting the golden image and then selecting 'Edit':
