...
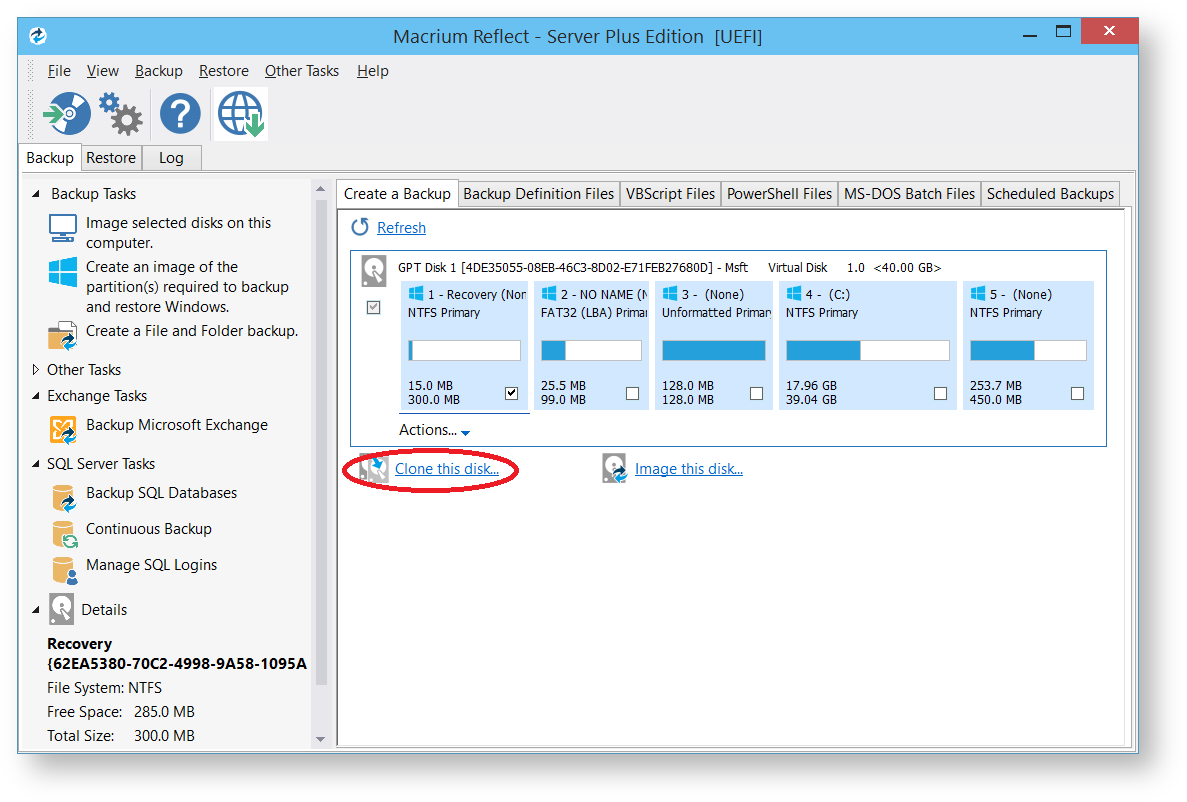
- Click the disk you wish to clone. In this case MBR Disk 1[0F0452A1].
Click Clone this disk.

- Click Select a disk to clone to...
- Select the hard disk you wish to clone to. In this case, there is only one disk available.
Drag the partitions you want to clone, the red arrow below shows this.

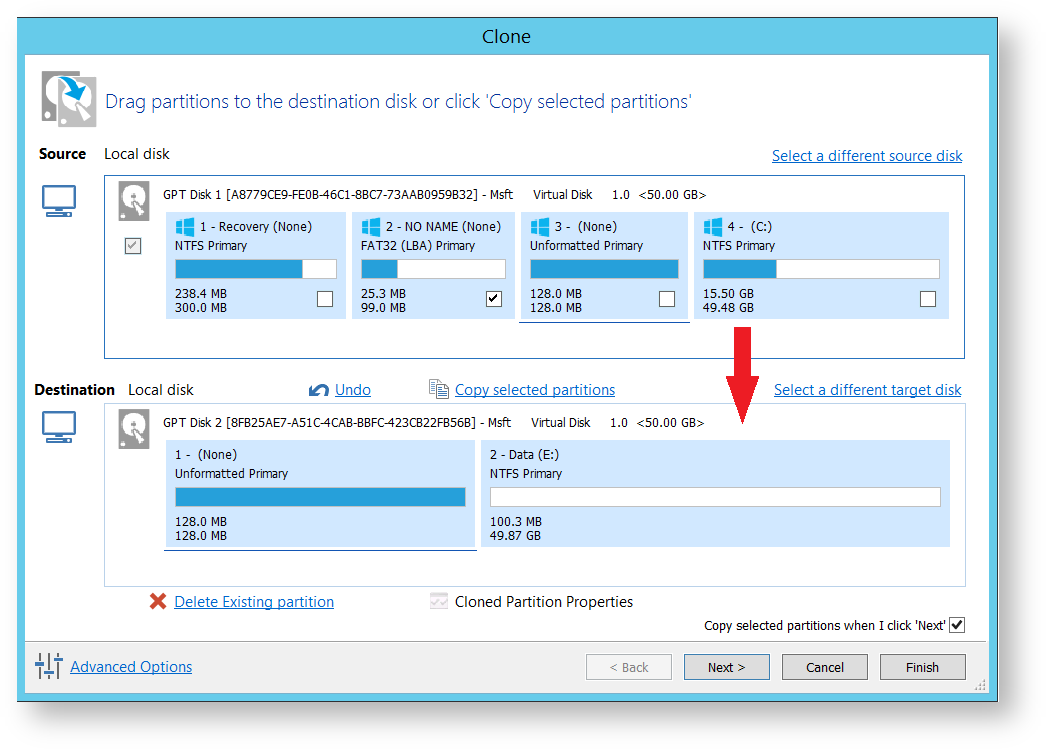
Becomes


In this example, the 15GB disk is being cloned to a 50GB disk. It easily fits but leaves large parts of the target disk unused. You can modify the size of each partition to fit the new disk if required.
If you have established partitions on the target disk, select each one and click Delete Existing partition before dragging and resizing partitions from the source.
To modify the partition sizes, click Cloned Partition Properties and adjust the size of the partition by:
- Setting the partition size precisely using the Partition Size entry box.
- Resize the partition automatically by clicking Maximum size, Minimum size or Original size.

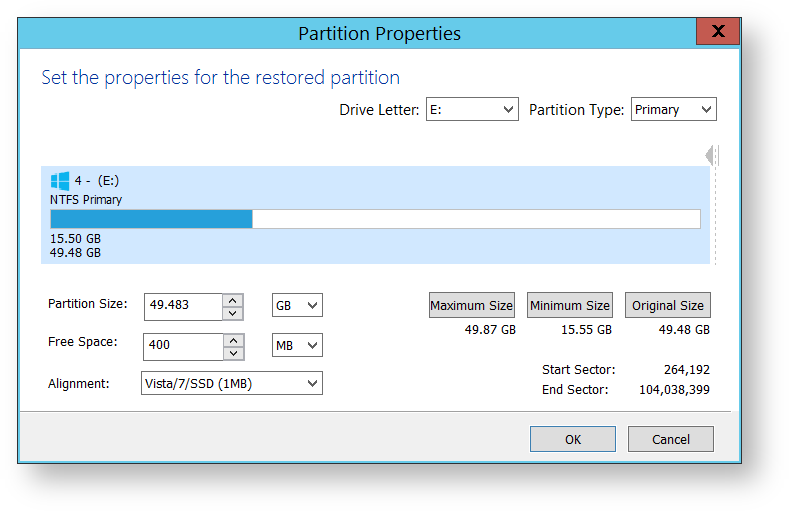
- Click OK.
- If required, click Advanced Options to:
- Perform an intelligent sector copy, that only copies sectors in use on the source file system. Select to:
- Verify File System, prior to cloning.
- Rapid delta clone, to only copy the differences between the source and the target.
- Enable SSD TRIM, to increase the lifetime performance of the device by flagging unused blocks.
- Perform a forensic sector copy, that copies all sectors from the source disk whether they are in use or not.
- Click OK.
The options to Add Schedule, Edit Schedule or Delete Schedule appear. - Make any required changes and click Next.
For more information see Scheduling backups. - Repeat for all partitions you are cloning.
- Click Next.
- Review the settings and click Finish.
Verify the settings in Backup Save Options and if appropriate, click OK.


A Warning box appears, if appropriate click Continue.


- The selected partitions clone, when complete, click Close.
- Remove and replace with a new disk if required.
| Info | ||
|---|---|---|
| ||
If you receive the error message 'Incompatible Disk Selected' when cloning then please see this article for more information: .Incompatible Disk Selected v6.0 |