It is possible to clone an entire hard drive or specific partitions on a hard drive. This is useful if you are upgrading to a larger hard drive. With Macrium Reflect you can boot the target disk on the same system after cloning. Cloning your hard drive creates a bootable new hard drive with the state of your computer at the time you undertook the clone.You can clone to a hard drive installed in your computer or to a hard drive installed in a USB hard-drive Caddy.
| Info | ||
|---|---|---|
| ||
| Windows cannot boot from a USB connected drive. This is a restriction imposed by Windows. If you clone your system disk to a USB connected external drive then, to boot your clone, the physical disk must be removed from the USB caddy and attached to your Motherboard SATA port. |
Deleting and re-configuring existing partitions or configuring new partitions is possible with Macrium Reflect, so you don't need to do this prior to cloning. However, in this tutorial, it is assumed that the new disk contains no partitions.
...
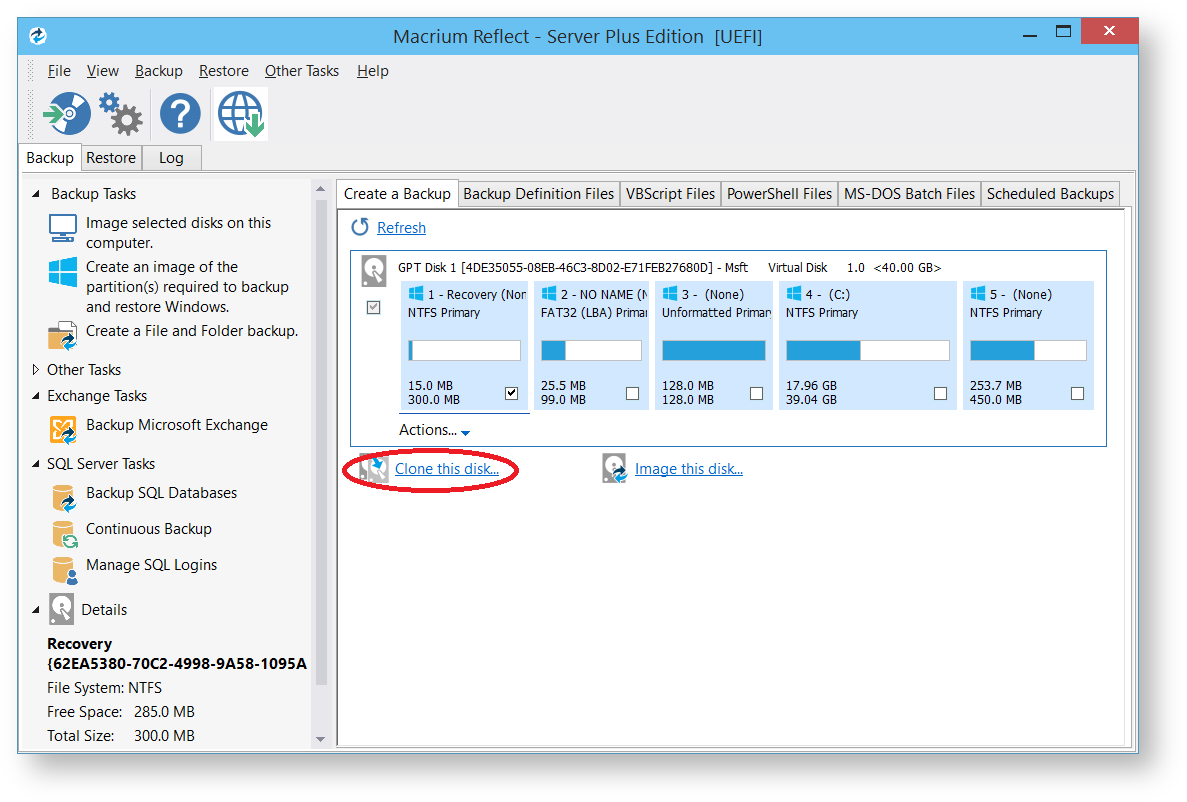
Click Clone this disk.

| Expand | ||
|---|---|---|
| ||
|


...
Select the disk you wish to clone in the main application window and Click 'Clone this disk'..

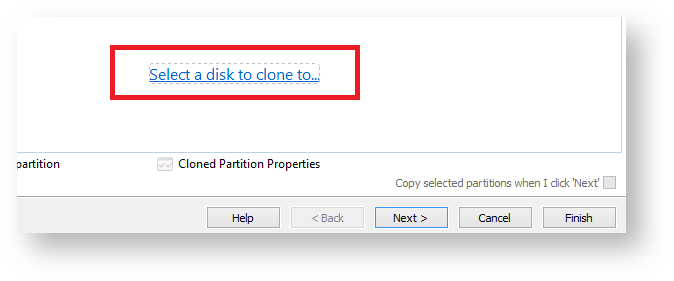
- In the wizard that opens Click Select a disk to clone to...
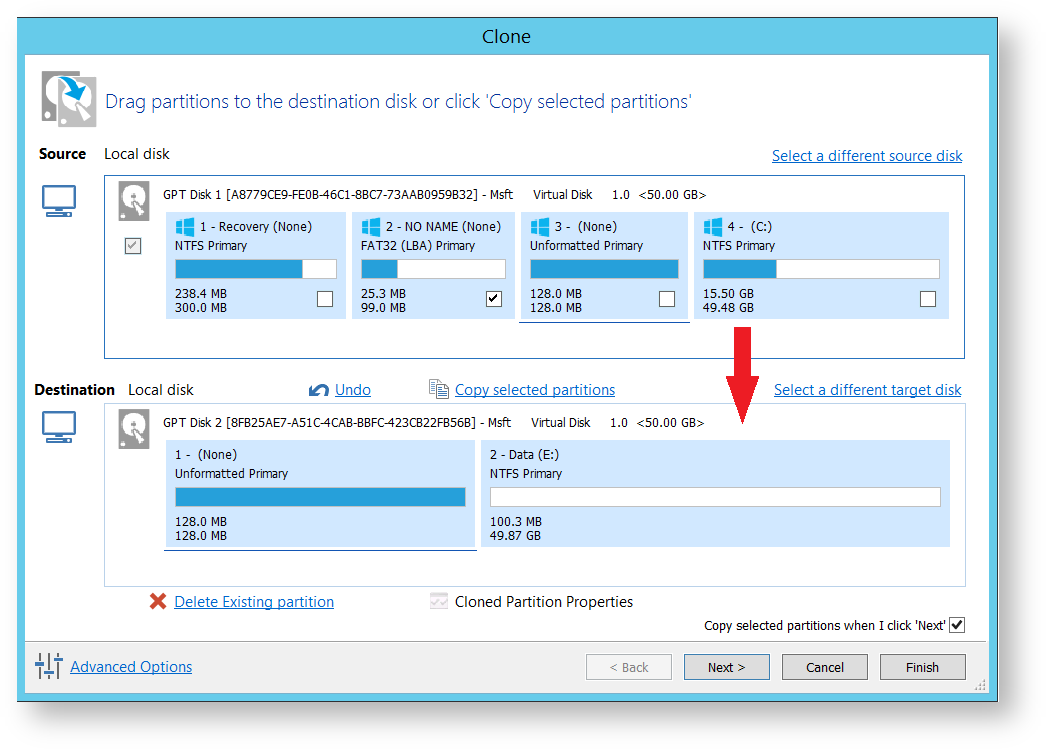
Select the hard disk you wish to clone to. In this case, there is only one disk available.
Drag and drop the partitionsIf you do not want to modify the order or size of partitions of the clone, click Next. This is the default behavior.
cloned
Alternatively, drag the partitions you want toclone, the red arrow below shows this.
If you have established partitions on the target disk, select each one and click Delete Existing partition before dragging and resizing partitions from the source.

Becomes
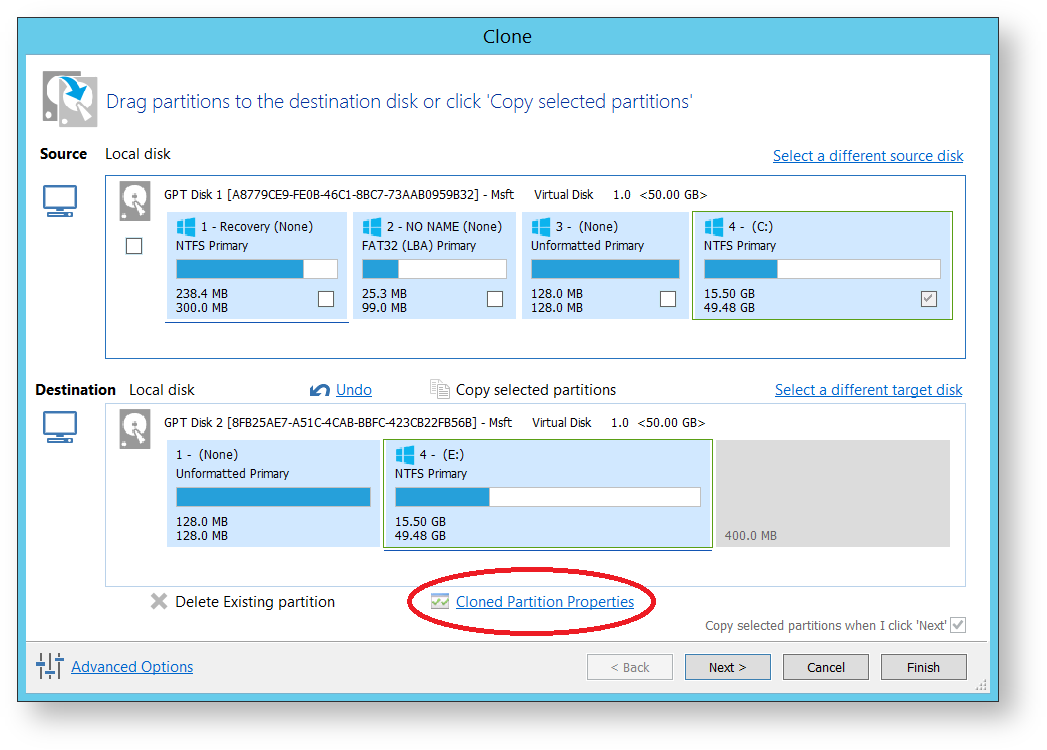
In this example, the 127GB disk is being cloned to a 1TB disk. It easily fits but leaves large parts of the target disk unusedthere is 400MB of free space after the copied partition. You can modify the size of each partition to fit the new disk if required. if required,
Info You can delete partitions on the target disk by selecting and clicking 'Delete existing partitions'.. - If required,
To modify the partition sizes, click Cloned Partition Properties.

Properties and adjust the size of the partition by:
- dragging the arrows circled in red,
- setting the Setting the partition size precisely using the Partition Size entry boxes,box.
- defaulting Resize the partition automatically by clicking maximum clicking Maximum size, minimum Minimum size or original or Original size.
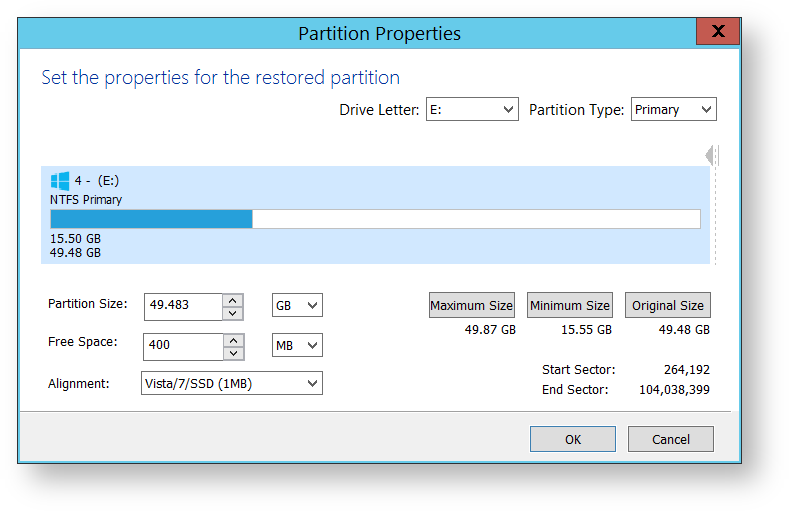
- Click OK.
- Repeat for all partitions you are cloning.
- Click Next.
- If required, click Advanced Options to change settings for this clone:

Include+ scrollPageId 0A80000A014D3820DCD1E4BC2A36FAD9
Click Next.Anchor 1 1
The options to Add Schedule, Edit Schedule or Delete Schedule is displayed.
Click 'Add Schedule' to optionally schedule your clone
Make any required changes and click Next.
For more information see Scheduling backups.- Review the settings and click Finish.
- The selected partitions are cloned and when complete, remove and replace the new disk if required.
A Youtube video detailing how to clone a disk can be viewed below:
Verify the settings in Backup Save Options and if appropriate, click OK.
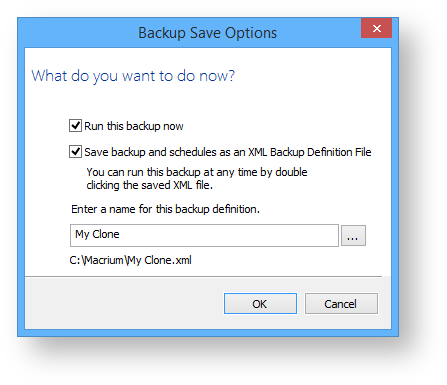
Info Note: Saving a backup definition enables you to run your Clone at any time with a single click Info Note: You must save your backup definition if you have created Clone schedules. Your schedules cannot run if this step is missed. If you want to run the Clone at this point, select 'Run this backup now' and click OK.
A Warning box appears, if appropriate click Continue.
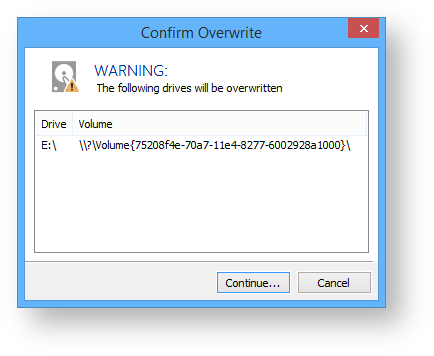
Info title Important The target disk for the clone operation will be overwritten. This is unrecoverable, so please ensure that the target disk contains no valid data.
The clone operation now starts.
| Info | ||
|---|---|---|
| ||
If you receive the error message 'Incompatible Disk Selected' when cloning then please see this article for more information: .Incompatible Disk Selected v6.0 |
...
Creating a clone video
| Widget Connector | ||||||
|---|---|---|---|---|---|---|
|