...
By selecting 'Image selected disks on this computer'.
Using this option will populate the Image Wizard with all selected disks and partitions in the application main Window.

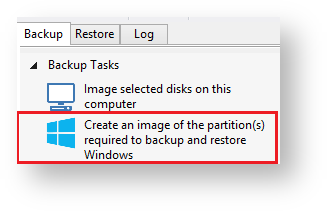
By selecting 'Create an image of the partition(s) required to backup and restore Windows'.
Using this option will choose all the partitions required to boot Windows. This may include hidden system partitions that are essential for Windows to start and run.
By Selecting a disk in the application main Window and click 'Image this disk...'.


By Selecting a disk in the application main Window, click on a partition, then click 'Actions' and select 'Image this partition only...'


...
| Anchor | ||||
|---|---|---|---|---|
|
The first page of the Image Wizard shows the selected disks and partitions to be included in your Image and allows you to choose a destination.

In the Destination section, enter the target backup folder.
You can type the destination path or click the browse button to choose a folder. The destination path can be on a local drive or network share.Info Note: You cannot enter a path that is located in any of the partitions included in the Image. The recommended name for your Image file is the unique backup set identifier {{ImageID}}. We recommend that you always use this recommended setting as choosing your own name can cause file name collisions. Please see How backup sets are created and maintained for more information on backup file naming.
...
The second page of the Image Wizard is where you create or edit your 'Backup Plan'. This defines the backup schedules and retention rules for your backup.


| Include+ | ||||||
|---|---|---|---|---|---|---|
|
...
The final page of the Image Wizard displays all settings used for creating this image.


Click Finish to Run and/or save your Image definition.
...
You are now given the opportunity to save the backup options.


| Info |
|---|
| Note: Saving a backup definition enables you to run your backup Image at any time with a single click |
...
If you want to run the backup at this point, select 'Run this backup now' and click OK.
...


| Conditional Content | |||||||||||||||||||||||||
|---|---|---|---|---|---|---|---|---|---|---|---|---|---|---|---|---|---|---|---|---|---|---|---|---|---|
| |||||||||||||||||||||||||
Related articles
|