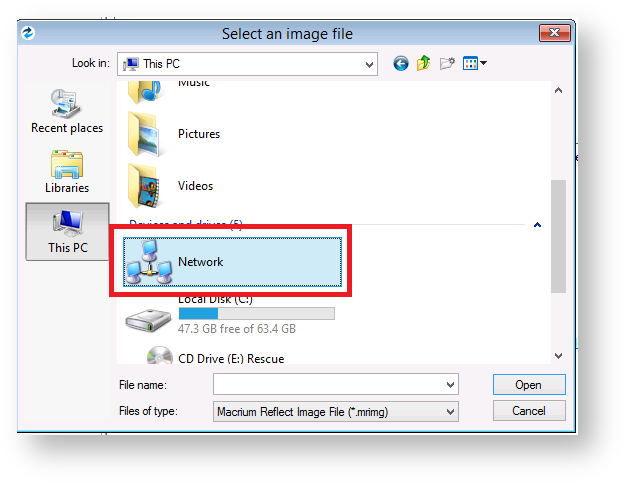
Alternatively, click the '...' browse button to browse the network for the shared folder: Expand the network server that contains the share you want to access: See also: Resolving network issues in Windows PE
If you have problems accessing shared servers then please see Resolving network issues in Windows PE
For example enter '.\Administrator'
This is not required for earlier versions of Windows PE. Accessing the network when creating an image in PE
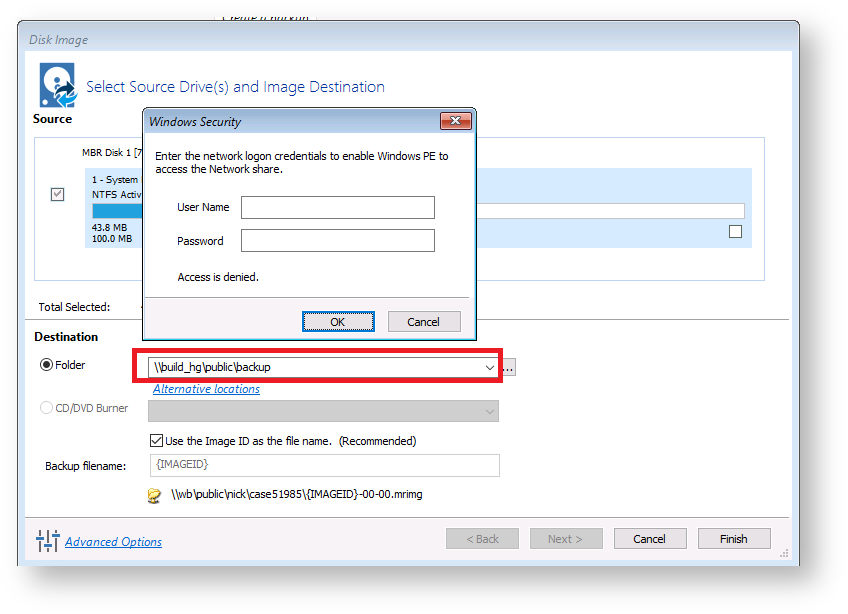

Expanding a network node that requires authentication will display the Network Credentials dialog:
Accessing the network when restoring an image in PE
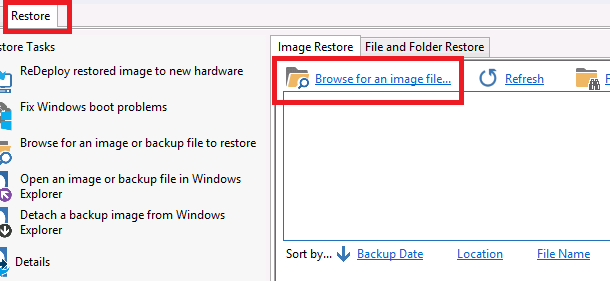


Expanding a network node that requires authentication will display the Network Credentials dialog: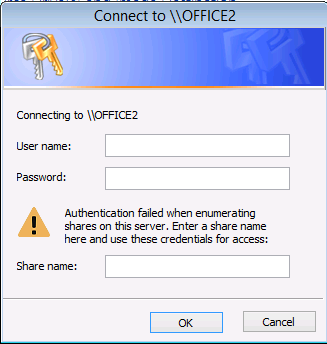
Troubleshooting Network Access
In the windows PE rescue environment, you may find that you can't connect to your network attached disk or another computer containing your backup. If this is the case, please use the following troubleshooting steps to resolve this issue.
Ensure your computer is connected via a network cable. Wireless (Wifi) network connections are not supported in windows PE.
Make a note of the name of the server (NAS device or computer) and share name you normally connect with.
In a command window type the following (replacing <servername> with your server name).ping <servername>
The ip address will be reported in and the reply responses.
Boot into the rescue environment.
Select the Restore -> View unsupported devices option. Are there any unsupported Network interface controllers listed? If so, you can locate a driver for a temporary solution, or for a permanent fix, add a driver and rebuild your rescue CD.
See the following article for further information. Adding device drivers to Windows PEIf you are confident that you have drivers for all relevant network devices have matching drivers loaded, select the Others tasks -> Network Config menu option.

Is there at least one network adapter listed. If not, you need to reconsider step 3.
Do you have an ip address (other than 0.0.0.0)? If not, check your network cable, and then hit renew. Alternatively, if you don't have a DHCP server on your network then enter a valid ip address for your network. Hint all domestic routers and corporate networks have a DHCP server configured by default.If you do have a valid IP address for your network, and you can still not browse to your network attached storage, confirm that you can map a drive.
To do this, start PE explorer (third icon from left on the taskbar).
The PE Explorer application opens. Click the 'Map Network Share' toolbar button:
You will need both the server name (or ip address) and the share name.
If this completes successfully, you will be able to access your network drive using the drive letter specified in the above dialog.