...
Click Restore image.

The following dialog shows. Source shows the location of the image file we are restoring from. The Target is the original location.
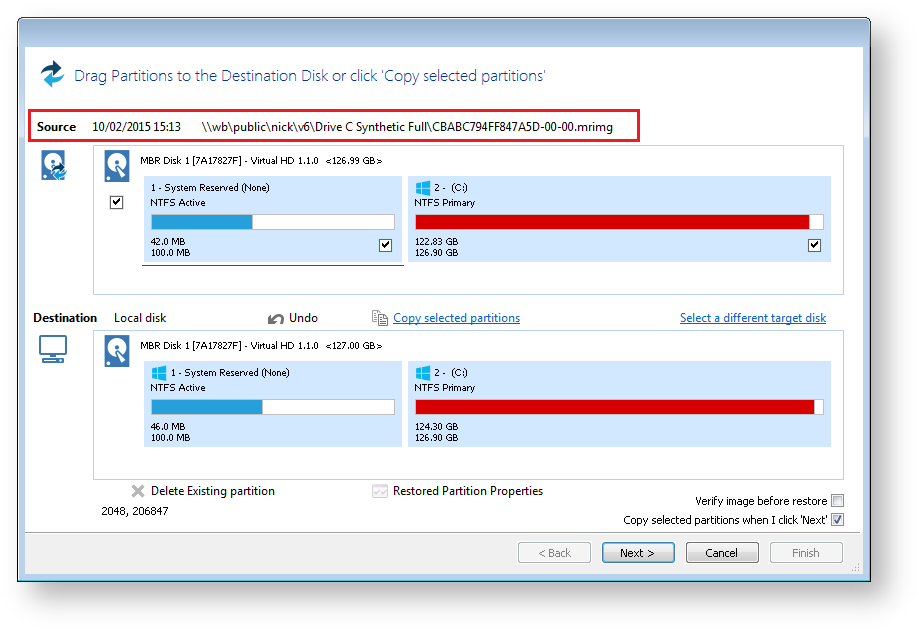
- Click Select a different target disk and select the required target disk.
- If you have partitions on the target disk which you are sure can be deleted, select each one in turn and click Delete Existing partition to create empty space.
Drag the source partition onto the destination partition.
The partition locates to the first available free area of the new disk. In this case, partition 2.

Click Restored Partition Properties.
The Partition Properties dialog appears for you to modify the size of the target partition.
There are a number of things you can do here:
Modify the drive letter by selecting another from the list.
Click between the arrows < > above the disk view and drag the partition to a new size.
Fine-tune the Partition Size, Free Space and Alignment.
Click Maximum Size to configure the partition to the maximum available unallocated space on the disk, in this case about 10 TB (the size of the disk)
Click Minimum Size to configure the partition to the minimum size, The minimum size is equivalent to the used space on the restored partition plus 50MB.
Click Original Size sets the partition to the same size as it was when backed up.
Info Note: If the source disk is an MBR disk and the target is greater than 2TB in size then the restore process will automatically convert the disk to GPT style format.
- Click OK.
...
See also: Drive letters assigned to restored or cloned partitions